How to Lessen Your Home’s Humidity
As adventurous as summertime can be, its excessive heat can also wreak havoc on your life—especially when accompanied by humidity.
As you’ve likely experienced (especially if you live in a naturally humid climate), dense air can feel inescapably oppressive, cause allergies to flare, and even make breathing difficult.
And if it’s affecting you, imagine what it could be doing to your home. Interior humidity is like a ninja in this sense, stealthily damaging both the structure itself and its contents. Fortunately, there are several steps you can take to help protect your place from this muggy menace.
Why it matters
Excess moisture in your home’s air can result in several layers of damage, with superficial issues such as peeling paint, wallpaper, and laminate being most frequent. The worst-case scenario, though, is structural: humidity can weaken and rot wood flooring, frames, walls, and beams, leading to a compromised framework. And if black mold is involved anywhere, you may need to get a professional involved to help remedy the situation, both for the health of your loved ones and your home.
Your personal belongings aren’t immune to destruction either. Extra dampness can ruin expensive items like furniture, and clothing and other fine linens can easily become musty and moldy in such conditions. As if all this weren’t frustrating enough, pests such as dust mites, centipedes, and cockroaches are attracted to wet environments, creating yet another problem to deal with.
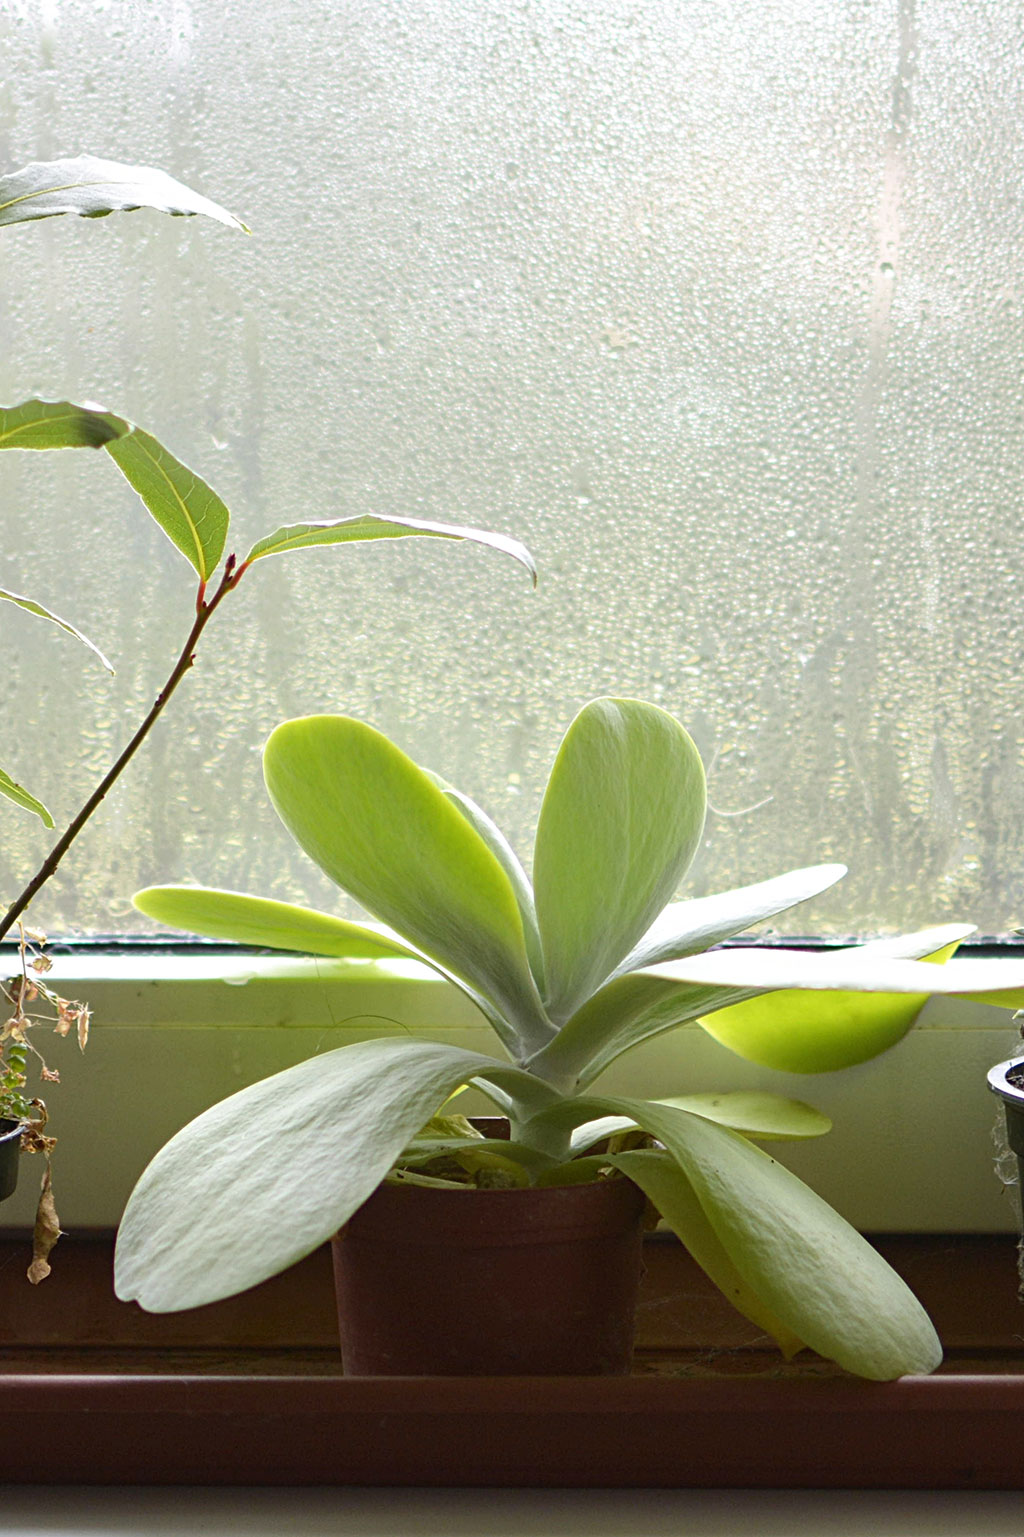
The bottom line: if you notice any telltale signs of high humidity—whether through feeling it on your skin, smelling mustiness, or seeing evidence like moisture on windows—start making plans to remediate it right away.

What to do
It’s important to first understand what you should aim for. In general, experts agree that a home’s relative humidity should be kept below 60 percent, with the EPA recommending an ideal range of 30 to 50 percent. To achieve these levels in your home, consider investing in products such as the following and making some simple changes to your living habits.
Humidity-reducing tools
- Hygrometer
This commonly used instrument keeps constant tabs on both a room’s temperature and relative humidity, making it highly valuable for any home. - Humidistat
A humidistat does the same but goes a step further by automatically adjusting the space’s humidity level, much like a thermostat does with temperature. - Air conditioner
Beyond providing refreshing cold air, an AC can remove moisture—so long as it’s functioning efficiently. Make sure to conduct regular maintenance to keep yours in tip-top shape, and weigh upgrading to a new model if it’s on the old side. And for those without a central system, it might be worth acquiring a window unit for a particularly problematic room. Of course, if you ultimately find that your AC doesn’t quite do the trick, you could always add a . . . - Dehumidifier
As the name suggests, this device’s primary purpose is to make your air less waterlogged. Most portable models, depending on their size and the rooms they’re used in, can generally remove between approximately twenty and fifty pints of water daily. There are also whole-house versions if the issue exists throughout your entire abode. - Humidity-absorbing wonders
Machines aren’t your only line of defense in this battle. For example, in small rooms or closets, you can utilize a moisture-absorbing product like one from DampRid. For a DIY alternative, baking soda, activated charcoal, or even powdered coffee creamer placed in a bowl can do the trick.

Three impactful lifestyle choices
1. Minimize interior-created humidity
A big source of humidity is bathrooms, where commonsense steps can make a huge difference. Primarily, bite the bullet and take cooler, shorter (five-to-ten-minute) showers, running your exhaust fan during and after them. (If you don’t have one, keep the door slightly ajar and, in more temperate seasons, the window cracked to allow moisture to escape.) Similarly, turn on your kitchen exhaust fan when cooking on the stove while also using vented pan lids to control the steam.
And don’t hesitate to employ old-school tricks. A simple way to reduce humidity after the aforementioned showers is to wipe down the bath, walls, and ceiling after you’re done, which will immediately remove standing moisture. On nicer days, you could even consider reverting to the classic method of hanging wet items on clotheslines—thus preventing 100 percent of any humidity that would be produced by your dryer.
2. Eliminate primary sources
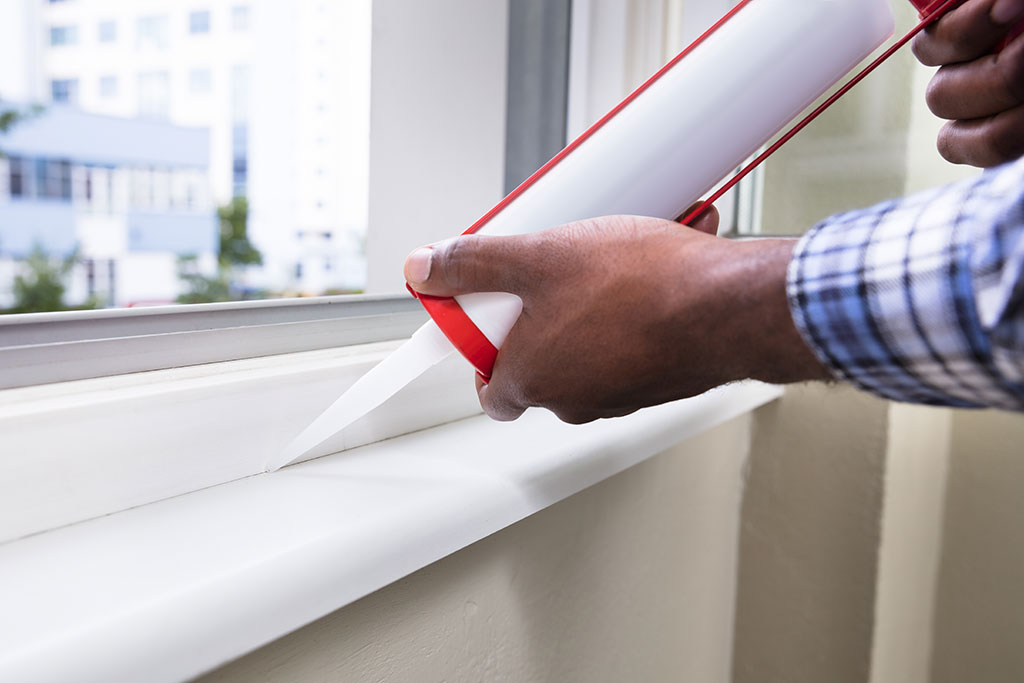
Outside humidity can’t impact your home if you stop it from entering in the first place. To start, check all windows and door frames for gaps, then seal them with silicone caulk where necessary to ensure that they’re airtight. Just as important, check your pipes and gutters to confirm that you don’t have any leaks.
In addition, you’ll want to examine an often neglected source of humidity creep: your foundation. If your gutters or yard slope is in poor condition, more water will likely seep through your soil into your home’s foundation, causing it to weaken. Seek out professionals to fix these respective areas if the need arises, and hire a basement or foundation expert regardless to do an inspection for complete peace of mind.
3. Create airflow
Preventing your indoor air from getting stagnant is another key to keeping humidity at bay. A good rule of thumb (weather and temperature permitting) is to open your windows during cool, dry conditions to create a cross breeze that will naturally dehumidify your home. Running your ceiling fans clockwise will also provide consistently cool air circulation. Finally, barriers like clutter and furniture can affect airflow—whether it’s provided by Mother Nature or your AC unit—so make sure that nothing is blocking windows and vents and leave bedroom doors ajar as often as possible.
Keep in mind that humidity isn’t always a problem. In fact, without enough of it, common household materials such as paint, caulk, and wood can shrink or crack. Whenever mugginess ramps up, though, take proactive steps to neutralize it and help prevent expensive home-related repairs and replacements down the road.
1679 Views
Related Posts


Popular Posts